
How to prepare clothing photos for AI models
Start with a clear front photo showing the whole garment. Add a back photo if that side differs, plus a close-up of an important detail. For shoes, prepare one side or three-quarter view of the whole pair.
This guide is for Fitting Room: clothing images on virtual models for stores, catalogues and social media. It does not measure shoppers or determine their garment size.
Start with the whole garment
Lay or hang the garment straight and photograph it from the front. Include the shoulders, sleeves and hem. For trousers, make sure the waistband and both legs are visible.
Use a plain, uncluttered background and soft light. Remove hands, packaging and other items. Heavy creases and harsh shadows make the cut and details harder to distinguish.
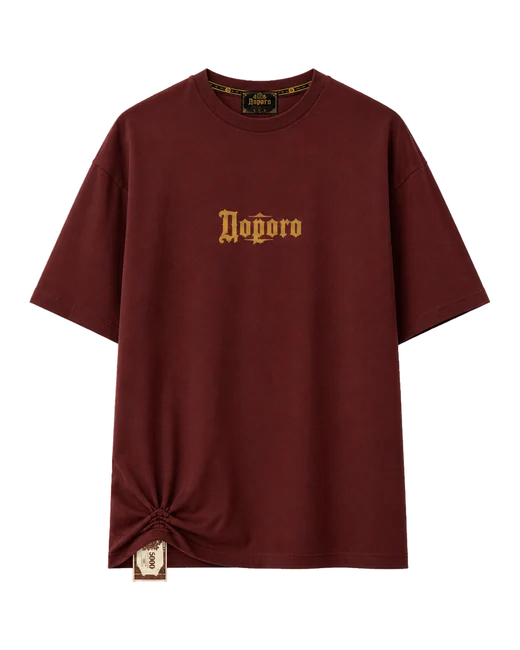
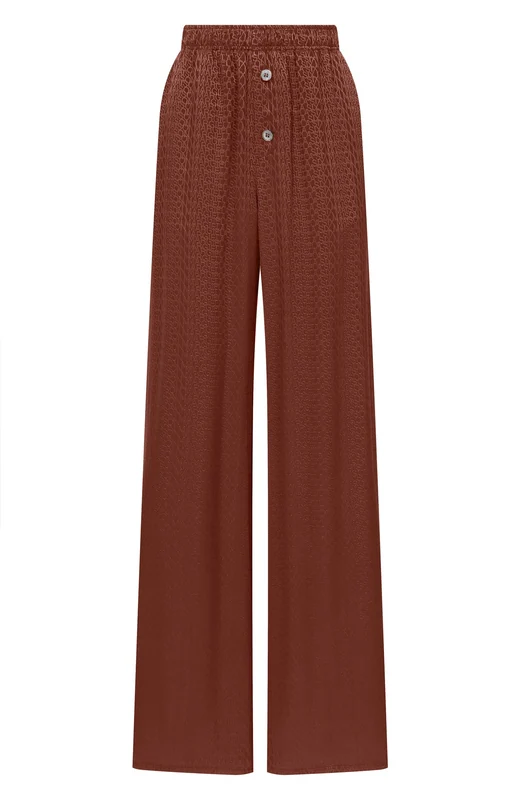
When to add a back view and a close-up
Photograph the back separately if it has a different print, pockets, fastening, slit or cut. If you mark the back as different in the garment form, its photo is required.
If you have no back photo, you can choose a neutral reconstruction. The generated view is an estimate: a front photo cannot verify an unseen back construction. Photograph the actual garment first when a back detail matters.
Take a separate close-up of a logo, embroidery, patch or turn-up. Describe what matters and which side it is on. A detail photo helps communicate the requirement, but does not guarantee exact lettering, patterns or shapes.
Show the shape of the shoe pair
Photograph the whole pair from the side or at a three-quarter angle. Keep the sole and heel height visible. Choose one clear image without feet, hands, a box or unrelated objects.
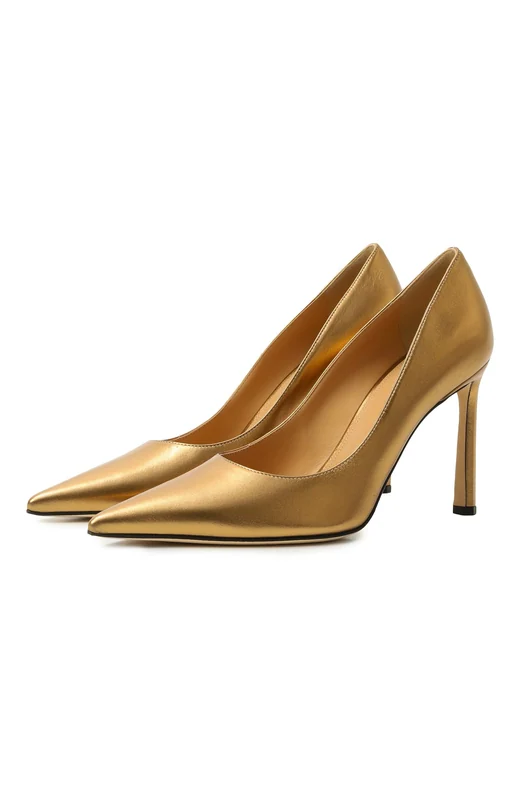
Check before uploading
Choose another source image if store buttons, harsh shadows or a cropped sleeve obscure the garment. A generated image cannot verify details that were not visible in the photograph.
- One product per image, with no collage or interface labels covering it.
- No cropped garment edges; the cut and important details are visible.
- A back photo is ready if that side differs, along with a separate detail photo.
- The file is saved as JPG/JPEG, PNG or WebP.
Compare the output with the product
Open the source photo beside the generated image. Compare the garment's length and silhouette, fabric colour, print and lettering. Check pockets, fastenings and back details; for shoes, compare the toe shape, sole and heel. Correct any changed essential detail before publishing. Features not visible in the source cannot be treated as verified. Keep real product photographs alongside generated materials.
- Details match: review every required view and the destination platform's requirements before publishing.
- Lettering, colour or cut changed: do not use the image as an accurate product representation; correct it or choose another.
- No back or detail photo: that part remains an inference. Add a photo of the real garment if accuracy matters.
Before your first outfit
Do I need a studio shoot?
A studio is not required by this guide. What matters is a fully visible garment, soft light, a plain background and separate photos of a different back and important details.
Is one photograph enough?
The garment front photo is required. Add the back if it differs; a separate close-up helps show a logo or other important detail. Shoes use one photograph of the pair.
Will the output show how the garment fits a shopper?
No. Fitting Room creates visual content for stores. An image on a virtual model does not verify size, physical fit or every product property.
Have your photos ready?
Share your assortment and the materials your store needs. The enquiry form has a country field and accepts your preferred contact. Access, scope and price are discussed separately.
Request a store demo